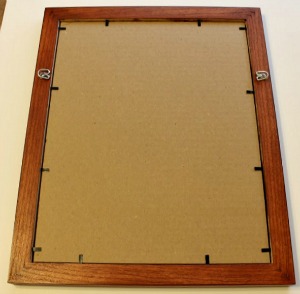
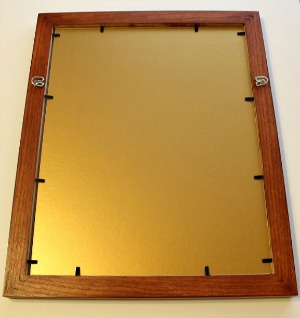
Picture Frame Backing
Close the Deal

You've reached the point of closing up your frame. Picture frame backing is one of the final pieces to put in place - literally. It doesn't have to be complicated or expensive.

In fact, it can be very easy and wallet friendly.

Depending on what you're framing; you can use cardboard, standard foam board, acid free foam board, mat board, hard board, chip board, easel backs, or what the heck, you can even use wood.

There are a bunch of choices, so let's sort through them and figure out what you need for your project.

Deciding what Picture Frame Backing to Use

I make a lot of diploma frames.

Acid free foam board is important because It helps prevent yellowing and deterioration of the diplomas that are pressed up against it.

If you're framing a poster of KISS you scored at a garage sale, you can probably "risk it" with regular foam board or cardboard.


5 Questions to ask yourself when deciding what type of backing to use: 

(click on questions to see possible answers)

  1. What am I framing, does it have sentimental or financial value?
  2. Based on question #1, does the item require acid free backing or not?
  3. Is it possible I will need to get "into the frame" again?       
  4. How thick can the backing be and still fit in the rabbet and allow space for fastening it?
  5. How will I fasten the backing in place?

Foam Board, Cardboard and Mat Board
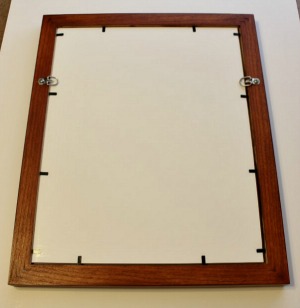
Foam Board Backing for Picture Frames

Foam Board

Cardboard Backing for Picture Frames

Cardboard

Mat Board Backing for Picture Frames

Mat Board 

Foam Board

  • Standard foam board is available in department stores, art stores and on-line.
  • Buy full 32 x 40 sheets and cut to size to save money.
  • Sold in standard picture frames sizes also, but more expensive.
  • Comes in several colors and varying thickness. Most common is 3/16"
  • Gives a clean, neat look to the back of the picture frame.
  • Acid free version is not always available in department stores or art stores.
  • Acid free version is more expensive, but will protect valuable items for decades.
  • Easy to cut. All you need is a straight edge and a blade.
  • Great for picture frame backing.

Cardboard

  • Available almost anywhere for free by cutting down boxes you already have. Or by saving the sheets that are often used in packaging of items you buy or have delivered. 
  • Sold on-line fairly cheap in standard sizes or as sheets - these will look cleaner and more professional. Often referred to as kraft board.
  • Not much of a color selection, thickness varies, but 1/8" is typical for most boxes
  • Not recommended for framing valuable items - cardboard is not acid free. You can however, place a piece of standard mat board between the cardboard and the framed item to protect it. 
  • As easy to cut as foam board. A straight edge and a blade will do the trick.

Mat Board

  • Great in a pinch if: you don't have more than 1/16" space left in the rabbet for a backing board, if you're using a cardboard backer and want an acid free buffer between the cardboard and art work, if you simply don't have anything else on hand and need a backing quickly
  • Can use scraps of mat board to make backing boards. Face out to show color and give a nicer look to the back of the frame.
  • Acid free - even standard mat board, being roughly 97% acid free, will protect for decades
  • A little bit more "challenging" to cut than foam board or cardboard, but you know that already....

My opinion is that foam board gives the DIYer the best of all worlds when it comes to picture frame backing. It's fairly cheap, its easy to work with, its sturdy and it offers an acid free option.

Whatever method you decide upon, you'll need to fasten the backing board into the frame.

I use an inexpensive Logan Flexible Point Driver. The time it saves and ease of using it make it a money saver if you plan on making frames on a regular basis.

Flexi-points are also great because they allow you to quickly remove and replace the backing.

For more options on picture framing hardware, check out the Picture Frame Hardware Page.

Hard Board and Chip Board

Hard Board

  • Hard board is sold in home improvement stores in sheets, art stores in smaller sizes and on-line in all sorts of sizes. It's fairly cheap - under $15 for a 4' x 8' sheet. It does cost more to get it pre-cut in standard sizes.
  • One side is nice and smooth which gives it a professional look when used as picture frame backing.
  • For the most part it is not sold as acid free. There are some acid free versions available on-line and through some art stores. The acid free version is more expensive. You can use mat board though as a buffer between the hardboard and the the item being framed.
  • Cannot be cut with a blade. You'll need a saw of some sort - table saw, jigsaw, or circular saw to cut it cleanly. It is 1/8" thick and very sturdy.
  • Only comes in brown.

Chip Board

  • Chip Board is a cross between cardboard and hard board. It's gaining popularity as a picture frame backing option because it's cheap and is also available in acid free.
  • It's not corrugated, simply recycled paper pressed together. It varies in thickness, is not as sturdy as the other options above, but can fill the role as a picture frame backing board quite nicely. 
  • Can be found in some art stores and easily on-line. sold in different sized sheets and in standard picture frame sizes.
  • Can be cut with a blade, but requires several passes, depending on the thickness used.

Easel Backs

Easel backs for picture frames range in price from very cheap to fairly expensive. Are you in need of a quick or cheap solution? Are you working on a meaningful gift that requires something more professional?

Either way, they've got your back - sorry had to throw that in there!


Adhesive easel backs are like this one, are cheap and easy to install.

Some are sturdier than others (see cost), but they're not as durable or professional looking.

Great for small frames given as gifts or if you just want to keep it low cost.


Non-adhesive easel backs like this one are much sturdier.

They come with hinged legs that allow you to use vertically or horizontally and even have hangers attached so you can hang on the wall.

You'll need to use turn buttons or flexi-points to attach them.


Hardware

No matter what type of picture frame backing you choose, you will need to use some type of hardware to hold the frame sandwich together. I use the Logan flexi-gun shown below, but I started out using washers and screws.

Whatever your budget, time and desire calls for - it's not hard when it comes to simple picture frame jobs.

In the near future I will cover more advanced techniques like dust shields and complete sealing of the back of a frame.


Turn buttons like these are cheap and allow you to   affix any type of backing to a picture frame with the simplicity of a screwdriver.

Not as professional looking, but get the job done.

Point drivers like this one make the job must faster and easier to install and remove the backing quickly.

While more expensive, it will save time and hey, time is money - so it's actually cheaper in the end.

Leave any questions, thoughts, tips or suggestions below!

Have a question or a comment? This space is for you! Leave it in the box below.


© Copyright  2012 -2022 by Al Pilato, picture-frame-it-yourself.com

Privacy Policy       Disclaimers

Updated November 18, 2022